This page updated 19 Apr 2013
Version note: Applies to Second Site 6 & 7
This article is intended to provide an overall framework for understanding how Second Site works, and the various tools available to personalize the websites you create with it. Other articles in my Second Site Section cover other topics about customizing your site.
Second Site is a program for constructing websites from data entered in The Master Genealogist – TMG. The data from TMG can be displayed in a variety of formats, and can be supplemented with information entered in Second Site if desired. The appearance of the website itself can be personalized with a variety of tools that require various levels of user skill to apply. This article describes the various tools offered by Second Site and how they work together to allow users with a range of skills, from novice to skilled website designer, to produce websites to meet their own objectives.
Sites created with Second Site may be posted on the Internet to be viewed by the world at large, or can be copied on to CDs or other media and distributed privately to family members. The descriptions in this article apply equally to either method of distribution.
|
Topics Included in this Article |
|
| How Second Site uses your TMG data | |
| The components of a basic website created by Second Site | |
| The three main tools for customizing the appearance of your site | |
| Choosing a different overall "look" for the site | |
| Options for the display of the data for each person | |
| Managing Menu items, charts, custom pages, and more | |
| Adding special pages to your site | |
The tools described in this article offer plenty of opportunity to customize a site to meet the needs of most users. For those interested in more advanced techniques, my article on Customizing Your Site offers some addition methods not included here.
Second Site builds a website from the data contained in a TMG Project. It accesses the data entered in Tags in TMG to construct pages displaying information about each person, as well as indexes, charts, and other supplemental pages. It accesses the Source and Citation data to construct citations in the website. Because it "understands" TMG's Sentences and Source Templates it can use these tools to format output just as TMG's own reports do.
Exhibits entered in TMG can be accessed by Second Site and placed in the site it creates (external exhibits only except for text Exhibits). Because the output of Second Site is in the form of web pages rather than paper reports, it can actually utilize more types of exhibits than TMG's paper reports. For example, websites can include PDF and audio files.
Because both TMG and Second Site require exclusive access to your Project files while they are working, you must close the Project in TMG before you open it in Second Site, and it must be closed while Second Site is actively "making" a site. You need not close Second Site when you open your Project in TMG to make corrections to your data; just be sure to close the Project in TMG before you tell Second Site to "make site" again to review your changes or you will get an error message.
The Data section of Second Site's user interface allows you to control many aspects of which TMG data is used, and how is it used. For example, you can specify the people who are to be included, and which Tag Types are to be used.
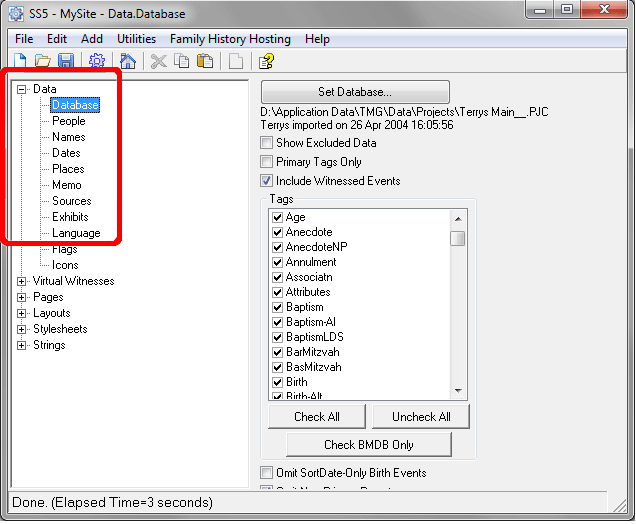
The screenshot above shows the Data > Database section, which is where you select which TMG Project is to be used, and then you can select which Tags will be used much as you would on the Tags tab of TMG's report Options. As with TMG reports, there are controls for how dates appear, which place elements will be displayed, when Memos will appear, and how Sources are to be used. Most of the controls for these elements found in TMG's reports are available in Second Site, in many cases with more options than offered for TMG reports.
For details on how to specify which people are to be included in your site, see my article Controlling Who is Included.
Second Site creates a quite usable site with just a few basic steps. See my article on Second Site Basics for details on how to do that. Such a "basic" site created with the default settings will be surprisingly sophisticated. It will contain the following sections:
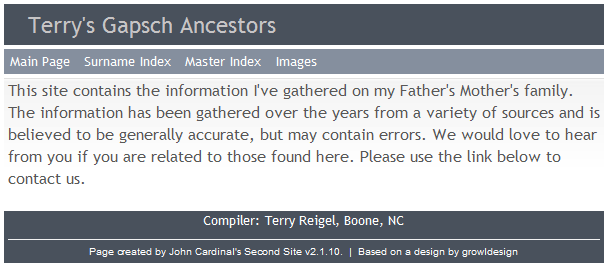
The default main page contains a site title, a menu bar for opening the other pages, compiler information, and some details about how the site was created. In the example above I've added a paragraph to explain what the site is about by entering the text in the Main Page Content field in the Main Page User Item in the Pages > User Items section.
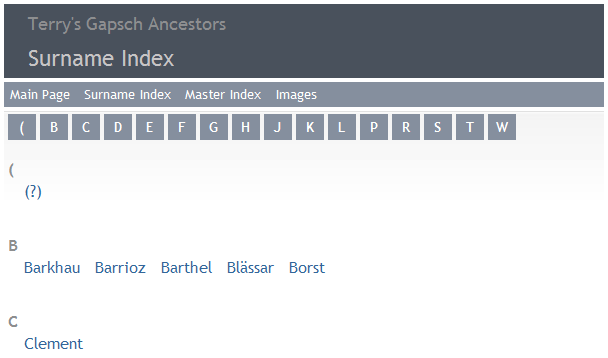
Clicking on one of the letter blocks takes the reader to the section of the Surname Index that contains surnames beginning with that letter. Clicking on a surname takes the reader to the section of the Name Index, below, in which that surname appears.
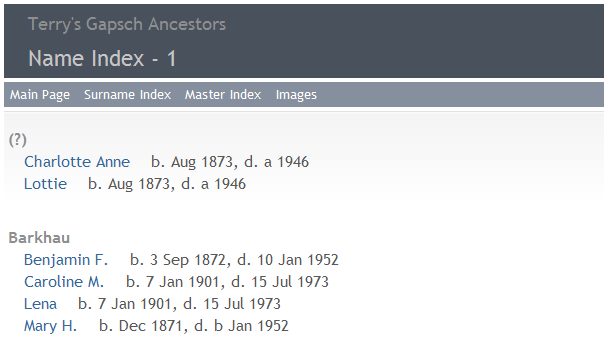
Clicking on a given name takes the reader to the Person Page where the information about that person appears. The Name Index can also be accessed from the Master index, which shows the range of names on each Name Index page. That index is more useful for larger sites that require a Name Index of more than a single page.

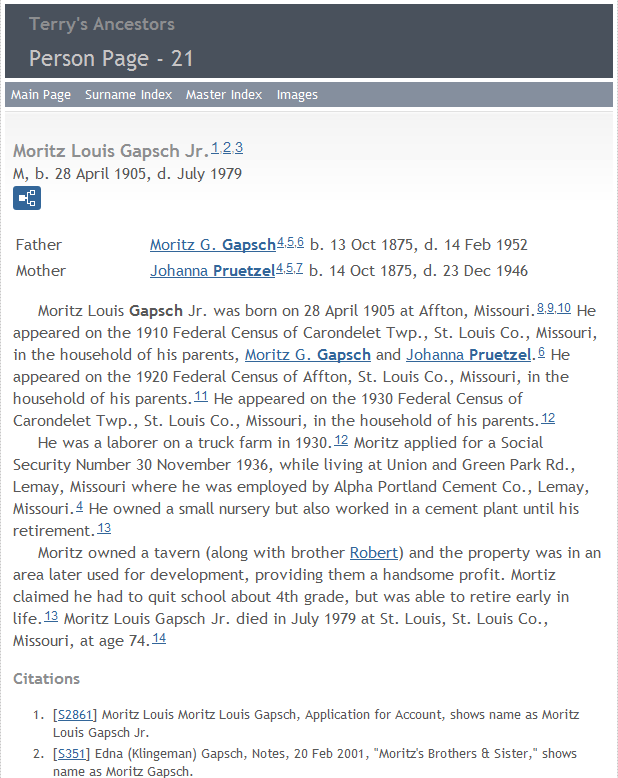
There will generally be several Person Pages, each containing a number of people. For a person who had children, there will by default be a list of children at the end of their section, similar to that produced by TMG's Journal report. By default, the data on the Person Pages is presented in a narrative style, similar to TMG's narrative reports. Other formats are available – see the Formats section below.
The text describing each person will generally mention other people included in the site. The names of those people appear as links if those people are entered in the associated Tag in TMG as Principals or Witnesses; but not if their names are typed into the Memo. Clicking on those links takes the reader to the Person Page sections for those people.
Citations entered in TMG appear as reference numbers in the text, with the citations listed below, as seen near the bottom of the screenshot above. Clicking on the reference number takes the reader to the associated citation. By default, those citations appear in TMG's "short footnote" format. The source numbers that appear at the beginning of each citation are links to the Source Pages. Clicking those links takes a reader to the section of the Source Page where the full footnote for that source appears.
Clicking the Family Explorer icon under the person's name and summary information opens a pop-up screen with a three-generation pedigree for the person, along with his or her siblings, spouse(s), and children:
If the person shown is included in the site, the name of that person is a link, which if clicked takes the reader to that person's entry in the Person Pages. Clicking either the tree icon or the "X" symbol closes the screen.
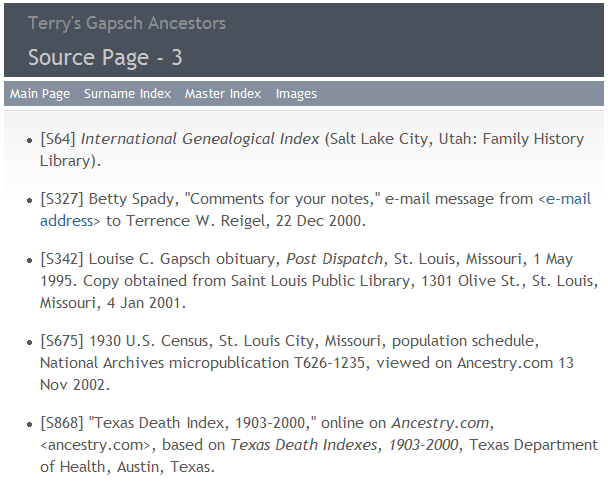
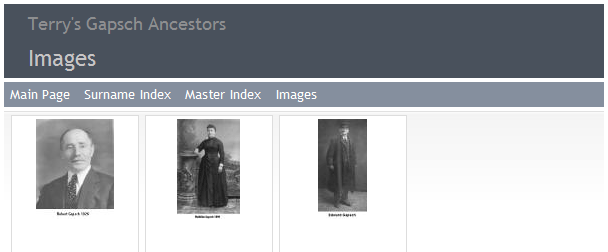
Clicking on any image in the gallery will take the user to the Person Page for the person to whom the image is attached.
The default configuration is intended to produce a very nice website "out of the box" for most users, but may need adjustment for best results with specific cases. We will now examine some of the many ways users can modify the content and appearance of the sites they create to suit their own preferences.
Second Site has the capability to produce sites in a wide variety of styles, each with a quite different "look and feel." The user chooses how the site will appear by choosing a Theme, a Format, a Layout, and then making choices from a wide variety of other options in the Second Site user screens. The three major tools for controlling the appearance and content of your site are:
The Theme you select controls the general "look" of the site - color schemes and graphics. Use of this feature is described in the next section, Choosing Themes.
Formats control a much more specific aspect - how the genealogy data for each person are displayed on the Person Pages. Formats control whether the data extracted from the TMG files is displayed in the generated site as narratives, in columns, bullet items, or another format. Use of this feature is described in the Formats section below.
I suggest that users interested in refining their sites make trial sites with some Themes that seem interesting. With a Theme of interest, try some of the different Formats to see which ones seem interesting. After one or two appealing Theme and Format combinations have been found, start working through the various options screens to fine tune the result to one that seems best for your needs and preferences. Second Site user Keith Winters' Gallery of Websites provides links to many different sites created with Second Site and may offer some ideas.
The overall appearance of the site created by Second Site is controlled by the Theme selected. The Theme controls the background colors used, any graphics, and the size, style and color of fonts used for titles, headings, and text. The default pages illustrated above use the Simple Blue Theme. Three of the many available alternatives are illustrated below:
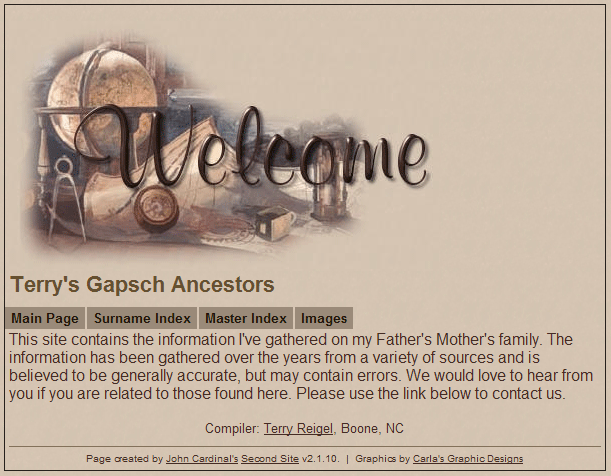
Carla's A New Adventure
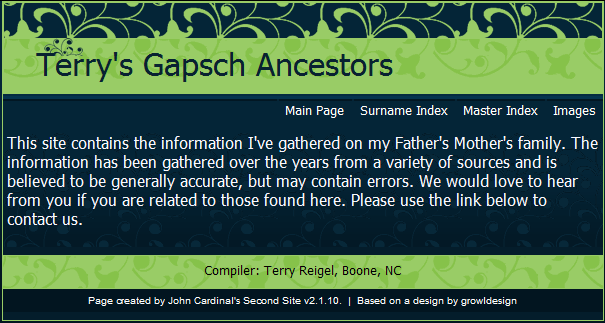
Mint Swirl
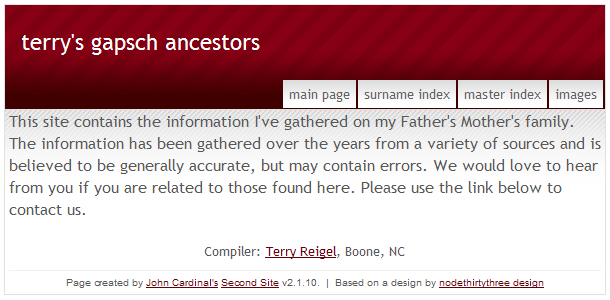
Nonzero Red
Themes are selected in the Stylesheets > Styles section:
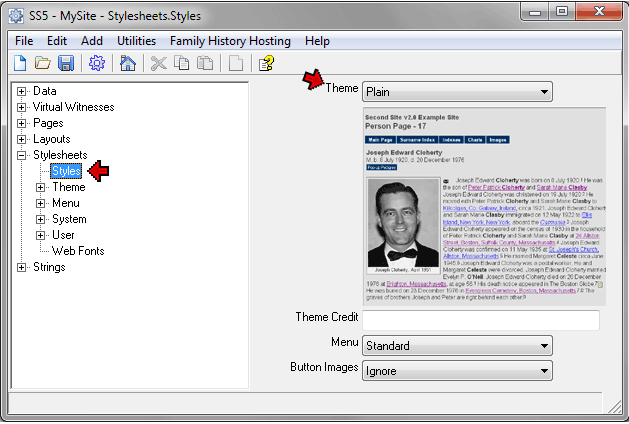
The "'thumbnail" preview changes as you select different Themes to give you an idea of the general appearance produced by that Theme.
The appearance created by a Theme can be modified if desired using the methods discussed in my Customizing Your Site article. In fact, one can start with the "Plain" Theme, which is designed for users that what to create their own site design, essentially creating their own Theme. Since most users don't feel the need to do that, at least initially, we will address other features below and leave that to another series of articles, Customizing with Stylesheets and Customizing with User Styles.
As seen in the sample screenshot of a Person Page above, those pages are where the bulk of the data we enter in TMG is displayed. By default, that data is displayed as it is in that screen shot, using the Narration Format, a style similar to TMG's narrative reports. But Second Site offers many other ways display the information. Two of them are shown in the following examples:
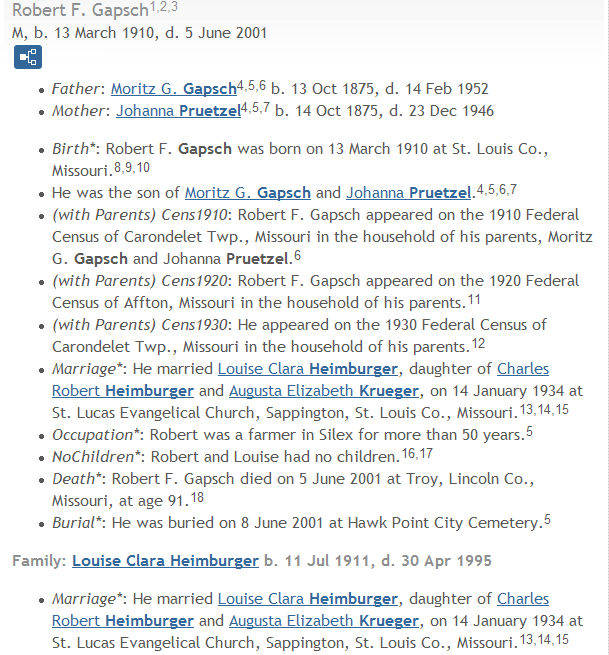
Bullets Format
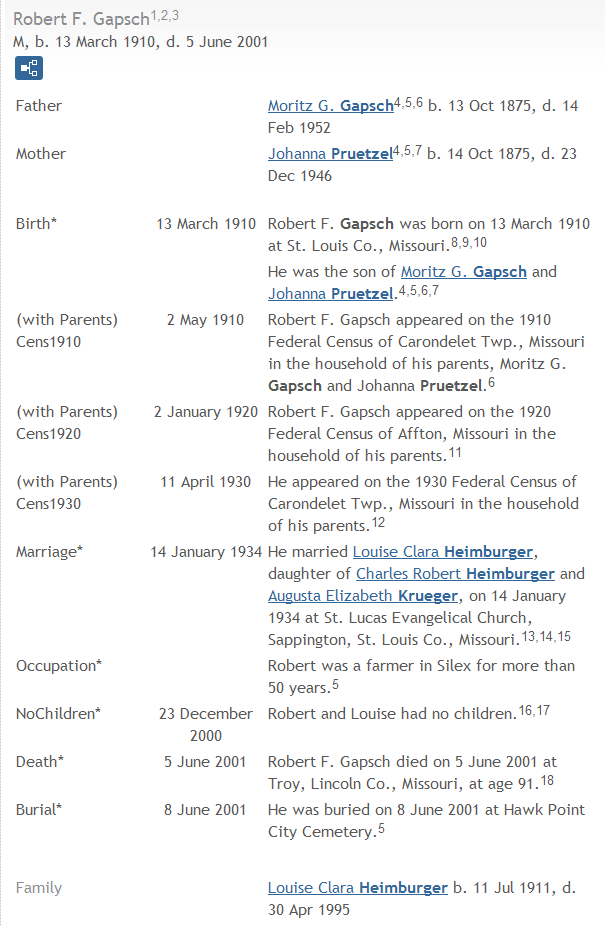
Grid Format
There are several other Formats available, and for each there are a considerable number of options which determine exactly how the data is arranged. The Format is selected in the Pages > Person Entry section:
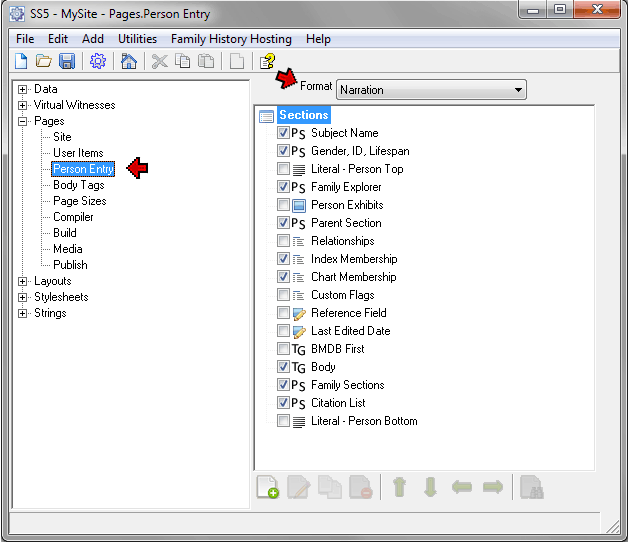
In this screenshot the default "Narration" Format has been selected. While a Format provides a overall framework for displaying the data on the Person Pages, there are a number of options to fine-tune how the data is displayed. These options include the following:
|
|
I use the Narration Format for both my Narrative Family History pages and the pages I create for distribution to family. For my Outline Family History pages I use the Bullets Unlabeled Format, as described in my Creating Minimalist Style Web Pages article.
In the Components of a Basic Website section above we saw the several types of pages created in a default website. Second Site can create other types of pages as well, including several types of ancestor and descendant charts, several kinds of custom indexes, and totally custom pages of the user's design.
These additional pages are managed in the Pages > User Items section of the Second Site interface. This section seems confusing at first to some users, perhaps because it is used to manage two separate but related functions – the display of menus on your site, and the generation of supporting pages. Looking at that section for a default website offers some clarification:
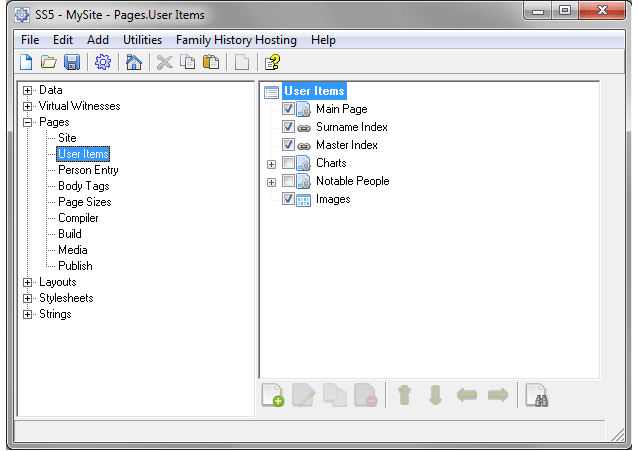
In the window on the right, six User Items are present. The first three – Main Page, Surname Index, and Master Index – are essential parts of the site. The other three – Charts, Notable Ancestors, and Images – are optional. Note that only the last of the second group has a check mark in front of it, which is why the other two do not appear in our basic site.
If you compare the checked items with menu buttons at the top of the pages of our basic site above, you can see that the same items appear, in the same order, on the menu. This illustrates one function of User Items, controlling the items that appear on the menu and their order. You can use the Up and Down buttons below the list of User Items to rearrange the order of the Items, they will then appear in the new order in the menu.
Looking again at the first three User Items, note that the second and third have a small icon representing links of a chain. That is because they are "link" items. That means that they only serve the menu control function in this screen. Unlike the Items discussed below, you cannot manage the contents of those two types of pages from the User Items screen. You only manage how, or if, they appear on the menus here.
A few of the other User Items are also "link" items, and they also serve only to control menu appearances. For example, you could add a Person Link so that a menu button would take the reader to the Person Page entry for a key person.
The remaining types of User Items discussed here serve both of the functions of the User Items section – the control of menu buttons and the management of pages you are adding to your site. The other Items visible in the screenshot above are examples of such Items. The Main Page Item is required for each site. It controls the content of the main page of the site, the one readers generally start with. The last three Items, Charts, Notable People, and Images are optional. They are provided in a default site to assist users in creating the more commonly used types of added pages. Of the three, only the last, Images, is enabled by default. You can enable the other two if you want to make use of them, or you can add your own as discussed below.
Five types of pages are available:
Exhibit Galleries – Are a sort of index to exhibits, displaying small "thumbnail" images of each exhibit. The Images page in the default site is an example of such a Gallery, in that case limited to primary images attached to people. There are controls available to include all sorts of exhibits, and to limit those included in a variety of useful ways. Exhibit Galleries are created with an "Other - Custom Page" User Item. See Help for details.
The preceding section described the several types of page you can add to your site. This section describes how to actually add them to your site. A new site definition, by default, already includes three supplemental pages. We already saw one type of supplemental page – the Image Gallery. Two other types, Charts and a Notable People Index are provided but are not active by default. These two items are provided so that users can easily add those types of pages.
If we examine the Pages > User Items section of a default site definition, we can see Charts and Notable People Items, which are inactive because the boxes in front of them are unchecked:
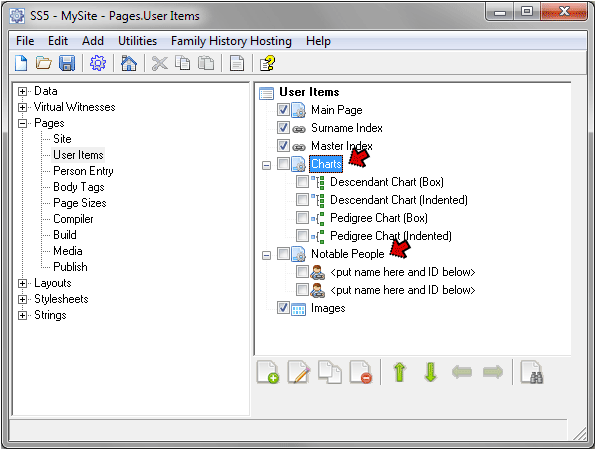
Both Items were created by adding a Custom Page User Item, then adding other subtending Items behind them.
The Chart page was created by adding SubPage, Descendant Chart, and Pedigree User Items, then placing the two charts under the SubPage. The result of that would be a page like this:
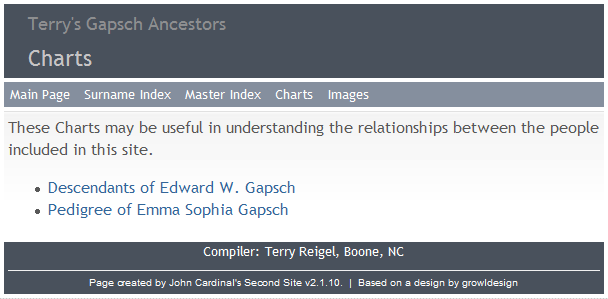
This is the page that opens when you click the Charts menu item. You would then open the individual charts by clicking on one of the links in the body of the page.
To create this page from the default Chart Item, I opened that Custom Page Item labeled "Charts" and added the brief introductory text to the Main Content field. Then I opened each of the Charts, entered the TMG ID number of the starting person, and changed the Titles of the two charts to make them more descriptive. Finally, check the empty boxes in front of each item so it will become active, and the page will be created when you make your site.
In practice, if one has only one or two charts they could be placed at the left-most column in the User Item screen, where each would appear as a menu button. But if there are several, collecting them on a SubPage as shown here keeps the number of menu buttons to a reasonable level.
The provided Notable People Item would be used similarly. Make any desired changes or add text to the Custom Page User Item labeled "Notable People," then open the associated Person Link Items and enter the person's name, TMG ID number, and descriptive text if desired. An example can be seen in my Adding Page Content article.
To create a new supplemental page you start from the Pages > User Items section, and click the Add button (the icon with the plus sign).
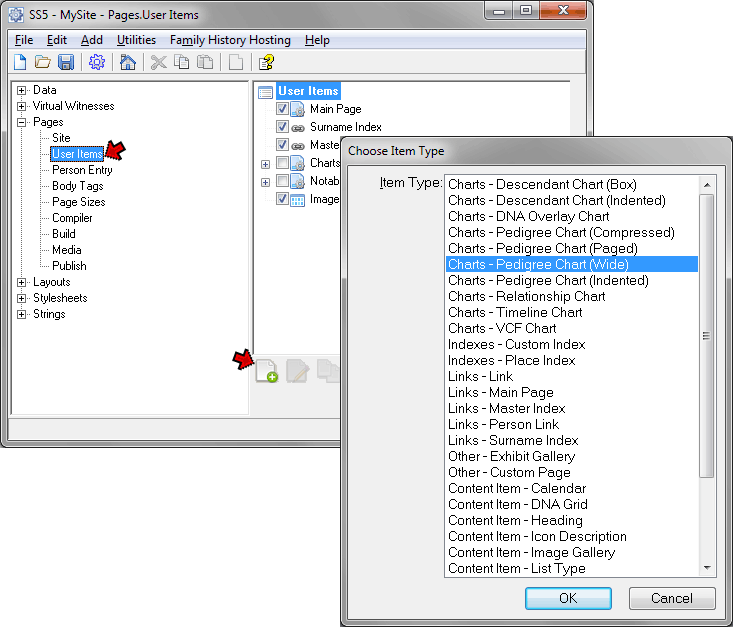
From the list of User Items that appears choose the desired type of items. (Links and Content Items cannot be stand-alone pages - they are used as content within other pages – see my Adding Page Content article for examples of their use.) After selecting the type of page you want to add, click OK and then enter the necessary data. If any data fields are unclear, press F1 for the Help, which offers details for each type of item.
After you have completed the screen for the new item, be sure it is properly placed in the User Items tree. As explained in the previous section, page Items in the left-most column create stand alone pages, and by default, appear on the site menu. Page Items subtending another page appear as links in the higher-ranking page. If necessary, move your new Item by dragging and dropping, or by selecting it and using arrows at the bottom of the screen.
This overview was designed to provide some insight into the ways in which you can customize a website created with Second Site to suit your own preferences. You may want to see my other articles on Second Site for some more specific ideas, or see Keith Winters' Gallery of Websites created with Second Site to see what other users have created.
Second Site's excellent Help feature can assist in applying any of the techniques discussed here. Either browse Help from its Table of Contents, or access the Second Site screen in question and press F1 to open the associated Help page.
For those interested in more advanced techniques for further customize their sites, my Customizing You Site article offers some addition methods not discussed here.
| ReigelRidge Home | Terry's Tips Home | Contact Terry |
Copyright 2000- by Terry Reigel