This page created 9 Nov 2014
Version note: Applies to Second Site 6 & 7
This article describes some techniques for easing the process of building, reviewing and editing your site. While building a basic site is simple, many users find they then want to spend some time either refining the appearance of their site, or modifying or correcting the data entered in TMG to produce the output that they desire.
| Topics Included in this Article | |
| Refining the “Look” | Speeding up trial builds as you refine the look of the site |
| Proofing the Person Pages | Speeding up the review of your TMG data |
| Keeping Track | Tracking those you have proofed |
| Publishing the Site | Speeding up the publishing process |
Editing your site to produce the output you have in mind can require a lot of trial builds, depending on how fussy you are about the appearance of the site itself, how many people are included and how much data you are including about each, how particular you are about how that data is presented, and the extent of custom pages you are including. The following sections describe techniques I've found helpful to make this process go more quickly.
Second Site includes a large number of options that allow you to modify the appearance of the site you create, and features that provide supplemental pages to add navigation tools such as indexes, charts, and search, and additional content, such as images and maps. Other articles in my Second Site Section cover various topics about using these features. Getting these tools set to produce exactly the site you envision may take a considerable number of trial runs, depending on how particular you are about the results. For each trial you use the Make Site command to build a new version of the site, review the results, and make adjustments to various settings to get exactly the result you desire. If your site includes a large number of people, or a large number of Exhibits or Images, the Make Site process can take more time than you would like.
The tips below can reduce the time it takes to make the trial runs for review after changing settings in Second Site. The techniques available depend on which aspect of the site you are working with:
The following sections describe techniques that can help with the proofing of the data in the Person Pages.
Most Second Site users quickly find that publishing their data in a website uncovers a variety of issues with their TMG data. These may include typing errors, data entered in the wrong places, inconsistencies in entering data, Sentences that don't produce the desired result, and many other issues. Correcting these issues requires reviewing a test build, editing the data in TMG, re-making the site with the corrected data, and reviewing the result. Depending on the data formats you are using, the extent of data recorded for each person, and your own standards, this can require a large number of build - edit - re-build cycles. The techniques described in this section can make that process go more quickly.
Never create a sub-set of your data in a separate Data Set or Project as a means to control who is included in your site. Doing so means you have to either correct any issues you find in both the sub-set and your main Project, or you have to re-create the sub-set after any edits are made to the main Project. Instead use Flags as described in my Controlling Who is Included article to control who is included in the site.
I have found two techniques that can speed up this process: 1) better coordinating the use of the Project files between TMG and Second Site, and 2) reducing the number of people in the site during proofing. They are discussed next.
Coordinating Use of the Project Files – We should first review the “rules” for how TMG and Second Site work together with the data files that make up your TMG Project. Each program must have exclusive access to the data files while it is actually working with those files. But that does not mean that only one of the two programs can be open at any one time. The requirements are:
In short, one should close the Project in TMG, or TMG itself, when opening Second Site and when making adjustments to the overall site or to most custom pages.
However, when reviewing and editing the content of the TMG data as displayed on the Person Pages, much time can be saved by leaving TMG open. When reviewing the content of the Person Pages the Project can be open in TMG at any time except the Make Site process is actually running.
Note that in this discussion I said the Project must be closed. That does not generally mean that TMG itself has to be closed, but just the Project. Thus you do not generally have to wait for TMG to re-open to edit the data after reviewing a section of your site.
Occasionally TMG fails to close one or more of the data files when you close the Project. One case I've found this to occur is after using the Secondary Output of the List of People report to change Flags, but there may be other cases. If this happens, when you tell Second Site to Make Site after closing the Project in TMG you will receive an error message that it cannot access a particular file. When that happens close TMG totally, then try again before asking John for help!
You can close and open your Project in TMG by use of the commands on the File menu, but I find it helpful to add buttons to my custom toolbar for that purpose. For a description of how to do that seem my Using Toolbars article. Specifically, I add two buttons:
With these two buttons closing and then re-opening the Project in TMG each requires only a single click.
Reducing the Number of People – When a site has a small number people the Make Site process completes quite quickly, but as the number of people increase the process can take longer than seems convenient. Limiting the number of people in the site during proofing makes the build - edit - re-build cycle go more quickly. This can be done by using a Flag to temporarily limit the site to a small group you are editing. Just remember to reset the Flag setting before you build the final version.
My narrative site, as described in my article on Virtual Sub-Sites, uses custom Flags to define each family group. I find it works best for me to add a few people to the site at a time and proof their Person Pages. I do this by manually setting the family Flag for that group. During proofing I limit the site to people marked with that Flag. If you don't use such a Flag for your site you could accomplish the same thing with a temporary Flag you create for that purpose.
If your site includes very many people it can be difficult to keep track of which people you have proofed. I have tested various methods of creating a checklist and have found a Descendant Indented Chart created in TMG to work best for me. For each group of people I want to add to my site I create a chart, as a word processor file. I then open it in my word processor and as I review each person listed I use the colored highlight feature in that program to mark those I decide to exclude (in red), those completed (in green) and those provisionally completed but needing more review (in yellow). Those not yet examined are left un-colored. An example is shown below:
I often include parents of spouses of descendants in my site, which are not included in the Descendant Indented Chart created by TMG. So I add them to the checklist manually.
For me it works best to add a small group of people to the site and review them, using the checklist as a guide. After proofing the text of the Person Page entry for a person I copy and paste it into my word processor to take advantage of its spelling and grammar checker to look for errors before marking the person's section complete on the checklist. After “approving” everyone in the small group I publish an update, as discussed next.
If you publish your site on the Internet you need to upload a new version after each update has been completed. In addition, since I am generally in the process of adding new people to my site, the copy currently in the '-o" folder is not the same as the version publicly available. I like to always have a copy of my published version available on my own computer, both so I can view it without going online and as a backup should something happen to the version on my web host's site.
Thus “publishing” an update requires updating both the version on my host and my local file copy. I've found ways to make that process very simple, as described below. As a result I find I post updates to my public website much more frequently than I did before.
Publishing Online – Updating the version on your web host requires uploading all the updated files, which can be numerous, to your host's server. That process is described in my article on Publishing Your Site. Since I've moved my site to John Cardinal's Family History Hosting service I have been able to use the Publish function in Second Site, which requires only a couple of mouse clicks to upload an updated version. I highly recommend John's service for those wishing to publish their sites online.
Creating a Local Copy – Copying all the files for your site to a separate location on your computer's hard drive isn't all that difficult. But after being able to use Second Site's two-click Publishing feature, the several steps required seemed comparatively complex, so I sought a simpler method. I've now developed the one described here, with aid from John Cardinal – thanks John. It involves the use of a “batch file,” which those who remember DOS computing may remember, and a little-noticed feature of Second Site to activate it within Second Site.
The batch file is pretty simple:
@echo off
Title Update RR Narrative Local Copy
setlocal
:PROMPT
SET /P AREYOUSURE=Overwrite existing Copy of RR Narrative (Y/N)?
IF /I "%AREYOUSURE%" NEQ "Y" GOTO END
Robocopy "D:\Second Site\RR Narrative-o" "D:\Website\roots" /S /R:1
echo.
echo Press any key to close
Pause >nul
:END
To create such a file, copy the text above into Notepad, edit the parts in red, and save the file with a convenient name and the extension “.bat” for “batch file.” The four parts you would want to edit, in the order they appear in red above, are:
When run, the batch file first provides an “are you sure?” prompt:
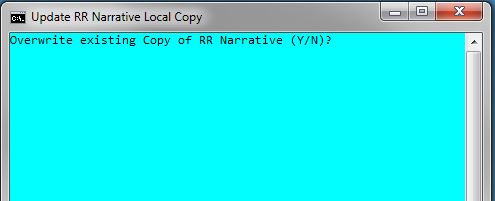
To complete the copy operation type “y” and press enter. The copy operation will then run, copying any files that are newer than those in the destination folder. When done the window remains open until you press any key to close it.
By default the widow will have a black background with white text. You can set the colors, font, and window size by clicking on the icon at the upper left corner of the screen and selecting Properties.
The batch file could be just placed on the desktop or other convenient place and started by double-clicking on it. But it seems more convenient to have it associated with Second Site since that's what I use to publish my site to my host, and Second Site offers a tool to do that. I placed it in the External Commands section of the Utilities menu in Second Site:
Since I have two websites, a “narrative” one and an “outline” one, I created a batch file for each, and either can now be started from the Utilities menu in Second site.
The batch files, or any other executable program, are added to that menu by adding them to a 2ndsite.ini file, which must be located in your User Data File folder, or UDF. That folder is defined from the File > Preferences > Set user data folder menu. It is the folder in which “-i” and “-o” folders appear if you have defined a UDF. You can create the 2ndsite.ini file in Notepad, with text similar to this:
On the “Name” line(s) you would enter the text you want to appear on the menu.
On the “Doc” line(s) you would enter the name of your batch file. With no path included with the file name, as shown here, the batch file must be placed in the User Data Folder as well.
If you have previously created a 2ndsite.ini file for some other purpose, simply add this text to it.
With this addition, “publishing” a local file copy is as simple as publishing an update to my web host.
| ReigelRidge Home | Terry's Tips Home | Contact Terry |
Copyright 2000- by Terry Reigel