This page updated 19 Apr 2013
Version note: Applies to Second Site 6 & 7
This article describes how to use the standard Stylesheets sections to make customizations to the appearance of your site, modifying the effects of your selected Theme and Format. My Customizing Your Site article describes the basic concepts and tools behind the many customizations possible with Second Site. This article explores some examples of how the hundreds of options in the Stylesheets section can be used to customize the appearance of your site. More advanced techniques that use User Styles to achieve effects not possible with the standard Stylesheet options are described in my Customizing with User Styles article. Other articles in my Second Site Section cover other topics about customizing your site.
This article is long and detailed, with many examples. Unless the reader simply wants to gain a feel for the use of stylesheets, I suggest scanning the list of topics below and reading only those that seem to be of interest.
Topics Included in this Article |
|
| Master control of your styles | |
| Setting the fonts for body text and headers | |
| Setting color for backgrounds and text | |
| Setting colors of buttons | |
| Setting colors for box charts | |
| Fine-tuning styles of individual features | |
| Turning off the shadows under boxes on box charts | |
| Adjusting the fonts used in Indented Charts | |
| Making the connector lines in Indented Charts more visible | |
| Setting custom colors for chart accents | |
| Positioning embedded exhibit images on the right | |
| Adding numbers for the children in the parent's lists of children | |
| Removing borders from Icon legends | |
| Changing link text to bold; underline only with "hover" | |
| Setting font styles for name in body of Person Pages | |
| Creating a distinctive style for the site title | |
| Managing the location of the Site Icon | |
| Styling the site's sub-title, and adding a line below it | |
| Styling the title of each page | |
| Changing box colors, link behavior, removing icons in the Family Explorer | |
| Changing font, spacing, of parent and other labels in Person Page entries | |
| Changing the effect of TMG's center and left indent codes | |
| Changing the fonts used for citation reference numbers | |
| Turning on the feature to highlight target Citations and Sources | |
| Creating boxed notes by styling a Narrative Panel | |
When you choose a Theme for your site you set a variety of features, including colors, font size and style, and much more, as described in my Overview article. Many of these choices can then be modified using the many options available in the Stylesheets section if you want to tweak some of the settings made by the Theme you select. You may want to use care in doing so because they are designed to present an integrated appearance as provided.
Alternatively, you can essentially create your own Theme, as I did in order to match the other pages on my website. If this is your objective it is best to start with the Plain Theme because it is "intended as a base from which you modify color properties and supply graphics to create a custom look," to quote the description in Help. You can then make adjustments to the Stylesheets to create the look you want. An example of the results can be seen in my Family History pages.
The Stylesheets section is broken into logical sub-sections, which are described below. For many of the sub-sections I have described some options I have used to customize my own family history site. Some of my examples illustrate methods I used because I was essentially creating my own Format, after starting with the simple Plain Format. But others are minor tweaks that one might choose to make to any Format. While you may want different results, these examples may illustrate methods you may find useful.
As described in my Customizing Your Site article, when you choose a Theme in Second Site, many of the styles in the Stylesheets > Theme section are set to create the "look" of that theme. Also as described in that article, many of the individual styles in the System sections described below are by default linked to those in the Theme section. Thus the Theme you select indirectly sets many, if not most, of the styles used in your site.
While the styles in the Stylesheets > Theme section are initially set by the Theme you select in the Stylesheets > Styles section, you can modify any of them, effectively modifying the Theme. The styles in the Systems sections which are linked to those in the Theme section are then automatically updated.
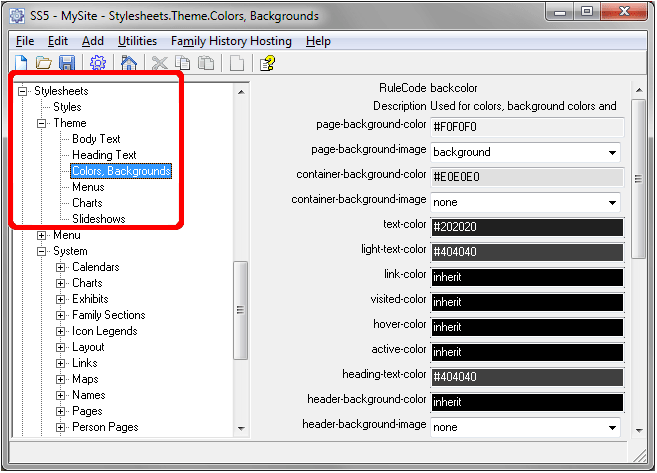
As can be seen in the screenshot below, within the Stylesheets > Theme section, there are two sub-sections which control the appearance of various text items, and four that control colors of the overall site, menus, charts, and slide shows. In this case the colors for the Plain Theme are shown. For comparison, see those for the Mint Swirl Theme in my Customizing Your Site article.
While you can modify the styles for any Theme, the Plain Theme, which I use, is especially intended for those who want a simple starting point from which to add their own preferences.
Listed below are some of the setting I used, listed in the order they appear on the Second Site screens. For rules not mentioned I left the settings applied by the Plain Theme, either because I was satisfied with them, or because they are not used in my site.
I prefer a serif style font for the majority of my site, including for most levels of section headers. So I changed two sections:
| Parameter | Value |
| font-family | Times New Roman, Serif |
| Parameter | Value |
| font-family | Times New Roman, Serif |
I wanted to change the background colors of the site to match what you see on this page, change the color of link text to my "signature" orange, visited link text to a darker color, and heading text to black.
| Parameter | Value |
| page-background-color | #FFFBE5 |
| container-background-color | theme:backcolor.page-background-color |
| link-color | #B76600 |
| visited-color | #990000 |
| header-text-color | #000000 |
See the discussion in my Customizing Your Site article on the advantages of linking the colors as shown for the "container-background-color" field above, and how to do so easily using the Color Picker tool. The same technique is used in many of the examples below.
I do not use menus on my site, but I wanted to change the color of the background color of the letter blocks that appear at the top of the Surname Index and the like to match my link color, so I set:
| Parameter | Value |
| item-background-color | theme:backcolor.link-color |
I wanted to set the colors of my Charts to match the colors used in the site. I wanted a unique color for the background of Ancestor Charts that fit with the other colors used in the site, so I chose a pale green color (for descendant charts, I use the Indented Descendant Charts, and set the background color for them, separately, in the System sections as described below). I wanted the boxes to use colors used elsewhere on the site, so I set the backgrounds to match the page background, and the boarders to match the color I had selected for links.
| Parameter | Value |
| backgroud-color | #cfeac7 |
| subject-backgroud-color | theme:backcolor.page-background-color |
| female-backgroud-color | theme:backcolor.page-background-color |
| male-backgroud-color | theme:backcolor.page-background-color |
| female-border-color | theme:backcolor.link-color |
| male-border-color | theme:backcolor.link-color |
The Stylesheets > System section allows modification to the styles of hundreds of detailed items. Many of the items listed are by default linked to the styles set in the Stylesheets > Themes section described above, either by using the "inherit" parameter, or in the case of colors by use of an explicit reference to a Theme color, as mentioned in the Note above. You can change those links if you want to obtain specific effects. In addition, many features have properties that are "built-in", that is are set explicitly in the System section and not linked to the Theme section. Any changes you want to make to them must be made in the System section.
Listed below are some of the setting I used in the System section, listed in the order they appear on the Second Site screens. Because of the large numbers of sub-sections in the System section, it is divided into groups of related items. While you may not want to create the same look I did, perhaps this list will offer some ideas of interest, or suggest how to achieve a particular result you have in mind. For rules not mentioned I left the settings at their default values, either because I was satisfied with them, or because they are not used in my site.
While the Stylesheets > System section exposes hundreds of properties that you can modify, there are thousands of styles used by Second Site. Those styles can be adjusted by use of User Styles, as described in my article on Customizing with User Styles. User Styles require more knowledge to apply, but may be worthwhile for users intent on arranging their sites "just so."
By default, the name boxes in box charts have a shadow under and to the right of the box. I preferred the appearance of the boxes without the shadows so I changed:
| Parameter | Value |
| box-shadow | deleted all contents |
The size of the font used for names in Indented Charts was larger than I preferred, so I changed:
| Parameter | Value |
| font-size | 13pt |
I preferred the connecting lines in box charts to be a bit more visible, so I changed:
| Parameter | Value |
| border-width | 2 |
I use the Accent feature to highlight ancestors and siblings of ancestors in my Indented Descendant Charts, and wanted to use custom colors for the Accents. I used the Color Picker, as described in my article on Customizing Your Site to choose colors that seemed to fit with other colors in my site. I only use two Accent conditions, so there was no need to modify the others. I changed:
| Parameter | Value |
| accent-1-background-color | #FC9 |
| accent-2-background-color | #CC9 |
I prefer to have my image exhibits on the right side rather than on the left. I found some adjustments were then required in other fields to give the spacing around the image that I preferred. So I changed:
| Parameter | Value |
| float | Right |
| margin-top | 8px |
| margin-left | 8px |
I like the children to be numbered in the list of children at the bottom of the entries for their parents, like they are in TMG's Journal report. So I changed:
| Parameter | Value |
| list-style-type | Decimal |
If you use Icons to mark various attributes of people in your site (see my article on Icons) Second Site provides Content Items in the User Items section for creating a legend explaining to readers what the icons mean. While I created my own HTML code to create such a legend, I did find it convenient to use the styles Second Site provides for that legend. But I did not care for the default black border around the legend, so I changed styles in two sections:
| Parameter | Value |
| border-style | None |
| Parameter | Value |
| border-style | None |
I had already set the colors for link text I wanted in the Theme section, above, but I also wanted to change the text in links that they appear in in bold font, with no underline except where the reader hovers the mouse over the link. I changed settings in two sections:
| Parameter | Value |
| font-weight | Bold |
| text-decoration | None |
| Parameter | Value |
| text-decoration | Underline |
By default names appear in the body of the Person Pages appear in normal fonts except for surnames, which are in bold. I prefer to have the surnames also in a normal font, so I left all the settings in the Stylesheets > System > Names sections unchanged except for one:
| Parameter | Value |
| font-weight | inherit |
Since I was essentially creating my own theme, I wanted to style the title of my site as it appears at the top of each page in a distinctive way. I wanted title text on the various pages to be my in signature orange and in a distinctive font, and centered. So I changed:
| Parameter | Value |
| color | theme:backcolor.link-color |
| font-family | Comic Sans MS |
| Use font for Main Page title | checked box |
| text-align field | Center |
As part of creating my own format, I added a custom icon, or logo, in the title area of each page (see my Icons article for details). I wanted that icon to be aligned to the left and centered vertically, so I changed:
| Parameter | Value |
| float | None |
| other | vertical-align: middle; |
The "other" field used here is present in many sections. It is intended for use in specifying parameters not specifically listed for this rule. It requires that the user enter both parameter and the value, as shown here.
I wanted the page subtitles to be in my signature orange, centered, and bold. I like a horizontal line below the icon (see above) and title text on each page to "finish" the title block. I found adding a "border" under the Sub-Title was a satisfactory way to achieve that. So I changed:
| Parameter | Value |
| color | theme:backcolor.link-color |
| font-weight | Bold |
| text-align | Center |
| other | border-bottom-style: groove; |
I wanted the title of each page to be in a different font than the body of the page, and in my orange color, and centered. So I changed:
| Parameter | Value |
| color | theme:backcolor.link-color |
| font-family | Arial, Helvetica, Sans-serif |
| text-align | Center |
I wanted to make several changes in the default appearance of the Family Explorer. I prefer that the Family Explorer Icon not change color when the reader hovers his or her mouse over it, and wanted to change the colors of the male and female boxes to better match my site colors. I wanted to not display the male and female icons in the boxes and lists of siblings and children. And I wanted the links in the chart to be styled the same as those in the rest of my site. So I changed:
| Parameter | Value |
| button-hover-color | theme:backcolor.link-color |
| female-background-color | #FC9 |
| male-background-color | #CC9 |
| Show Box Icons | un-check box |
| Show List Icons | un-check box |
| link-color | inherit |
| visited-color | inherit |
| hover-color | inherit |
| active-color | inherit |
| text-decoration | inherit |
I use the Narration Format, which like many Formats, uses a grid arrangement for the Father, Mother, and other labels at the top of each person's entry on the Person Pages. I wanted those labels in a bold font, and to move the following text closer to the labels. So I changed:
| Parameter | Value |
| width | 3.6em |
| other | font-weight: 700; |
Note that the "g1" style, which is controlled by this section, is also applied to other labels some other Formats so the above settings my produce undesirable results in other Formats.
I also added a colon at the end of each label, but that required use of a User Style, as described in my Customizing with User Styles article.
I use TMG's [LIND:][:LIND] (left indent) codes mostly for the body of quoted newspaper clips, and for the text in my "Research Notes" tags in which I describe issues with a given person's data, and in the text of the FamilySectionNote tag, in which I describe issues with the list of children for a couple. I find all of those work well in a smaller font, and also indented on the right side as well as on the left, as is traditionally done with long quotations, and indented a bit more than the default value. I use TMG's [CENTER:][:CENTER] codes mostly for the headlines in quoted newspaper clips, which I like to display in a bold font. So I changed two sections:
| Parameter | Value |
| font-size | Smaller |
| font-weight | Bolder |
| Parameter | Value |
| font-size | Smaller |
| margin-right | 7em |
| margin-left | 7em |
I wanted the superscripted citation reference numbers within the text to be in the same font family as the rest of my text, so changed:
| Parameter | Value |
| font-family | Inherit |
Citation reference numbers are links, so a reader can click on the reference number and the page will scroll to citation. An optional feature highlights that citation to make it more visible, and similarly highlights a Source on the Sources Page when a reader clicks on the source number at the beginning of the citation. The highlighting feature is off by default, and is activated by setting a colored background to serve as the highlight, and/or setting a border width greater than 1. I chose to use a background color without a border, but wanted that highlight to have rounded corners. I also wanted to enlarge the colored highlight a bit beyond the edges of the text. So I made these changes:
| Parameter | Value |
| background-color | #FC9 |
| other | border-radius: 5px; padding: 3px; |
I selected the color to be harmonious with the other colors on my site, but sufficiently different to serve as a highlight. I made the selection with the Color Picker, which is described in my article on Customizing Your Site.
I use Narrative Panels to set off my Research Notes Tags, in which I mention various issues with the research on specific people, as described in my Tag Groups article, and for my copyright notice. In order better set these items off from the normal text I created a colored border around the panel. I also added some padding to separate the border from the text, and set the width of the panel to 80% of the width of the window in the reader's browser. Finally, because since my Research Note Tag encloses the body of the note in [LIND:]...[:LIND] codes, and I had already set the text within those codes to "smaller" (see Printer Codes, above), to avoid making smaller still I changed the "font-size" parameter from it's default "small." This required in changes in two sections:
| Parameter | Value |
| border-width | 2 |
| border-color | theme:backcolor.link-color |
| padding-right | 10px |
| padding-bottom | 10px |
| padding-left | 10px |
| other | width: 80%; border-radius: 10px; |
| Parameter | Value |
| font-size | normal |
The list above, while seemingly long, still includes only some of the over 100 sections available. Finding the section you want to modify may seem daunting, but many of those refer to specific features, such as charts, maps, calendars, etc., so only you need only examine those that relate to features you use. Review the available options, read what Help offers, and experiment to see what changes appeal to you.
The settings described above allow you to customize a huge number of features. Still, if they don't allow the Style changes you would like to make, check out my article on Examples for User Styles for some more advanced methods.
| ReigelRidge Home | Terry's Tips Home | Contact Terry |
Copyright 2000- by Terry Reigel