This page created 12 Dec 2011
Version note: Applies to TMG 8 & 9
The Export / Import feature for Tag Types provides a simple way to copy customized Tag Types from one Data Set or Project to another. It also provides a means for users to share custom Tag Types with other users. The process is similar to that used to export and import Source Types, though with a few differences. That feature is described in my article on Exporting and Importing Source Types.
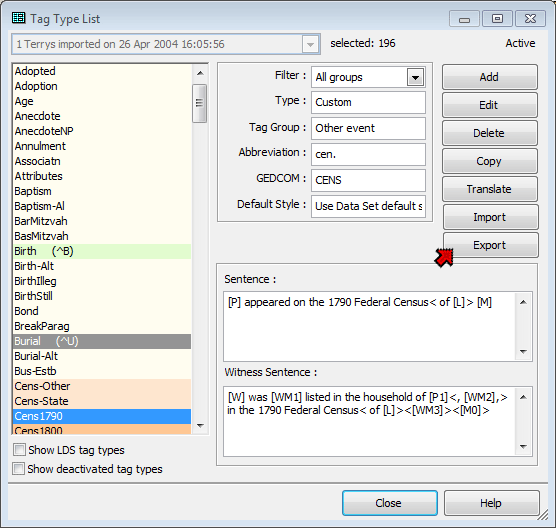
The first step in exporting Tag Types is to open the Tag Type List (Tools menu), and click the Export button to begin the export process.
The Export Source Types screen opens, in which we can specify that all Source Types are to be included, or select the specific ones.
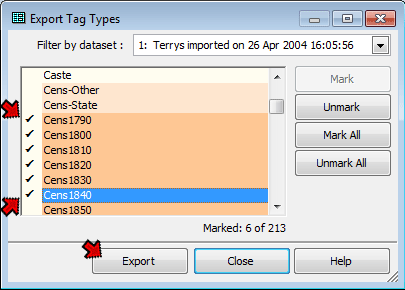
Here we are selecting some custom Tag Types to be exported. We could use the Mark and Unmark buttons, or double-click on the items we want to select or unselect. When we have made our selections we click the Export button.
The selected Tag Types will be copied into a file, so we have to give that file a name in the Export screen:
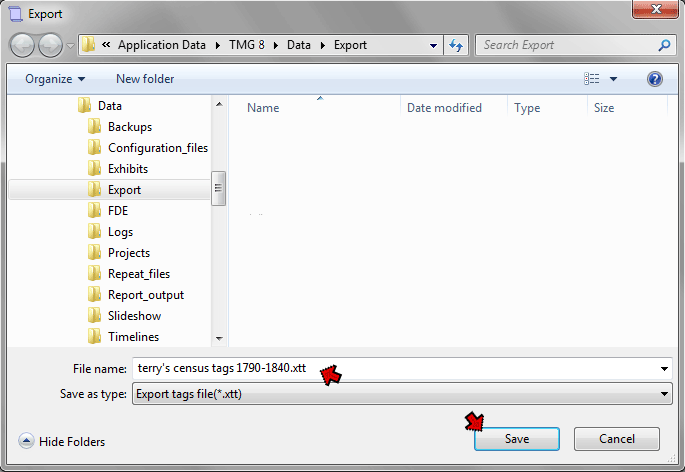
We can enter any descriptive name. The file will be saved by default in the Exports folder, under the folder in which Projects are stored. But we can choose a different location with the Save In drop-down at the top of the screen. When we Click the Save button, a dialog box notifies us that the file is successfully saved.
The Tag Types can then be imported into another Data Set or Project, or sent to another TMG user if desired.
We start the import process by clicking the Import button on the Tag Types screen, visible in the first screenshot above. This opens the Import screen:
We select the file containing our exported Source Types, and click the Open button, which opens a second Import Tag Types screen:
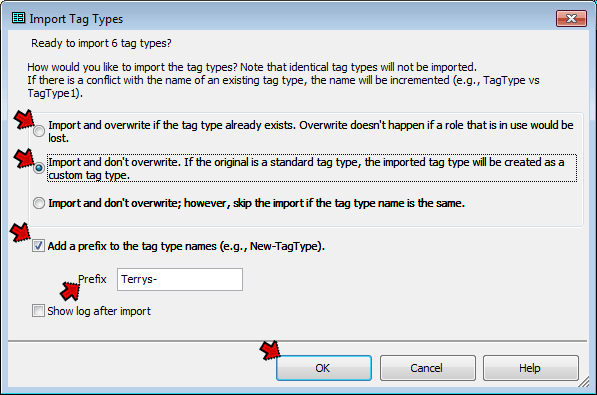
This screen allows us to specify what is to happen if a Tag Type of the same name as one being imported already exists in the Data Set, by choosing one of the three options in the box. The choices are:
Separately, we have the option to add a prefix to identify the imported Tag Types if we want. Do that by checking the box as shown above, and entering the text of the prefix. If you choose this option and have selected the "Import and overwrite" option above, all existing Tags of this type will still be changed to the new Tag Type. If you have chosen the "Skip" option above, the duplicate will still not be imported.
After we click the OK button a dialog opens reporting whether the Tag Types were successfully imported. If they were the new Tag Types will now be listed in the Tag Types List, ready for use. They can now be used for new Tags we might add. If we checked the "Import and overwrite" option they will already be assigned to existing Tags of the same type; if not we can manually modify existing Tags so they use the new Tag Types.
| ReigelRidge Home | Terry's Tips Home | Contact Terry |
Copyright 2000- by Terry Reigel