This page created 24 Jun 2019
Version note: Applies to Gedcom Publisher 1
This article is describes how to create custom "front matter" pages for an e-book produced with Gedcom Publisher. Other articles in my Gedcom Publisher Section cover other topics about using the program.
|
Topics Included in this Article |
|
| Creating a page to contain the front matter | |
| Adding text to the page | |
By default, Gedcom Publisher creates a title page and a table of contents, which are placed before the chapters containing the main content of the book. These pages are generally known in publishing as "front matter." Traditional books also commonly include other front matter, such as credits, dedication, forward (usually written by someone else), preface (usually written by the author), and acknowledgements. This article describes how to add such pages to your e-book, using as an example a Credits page.
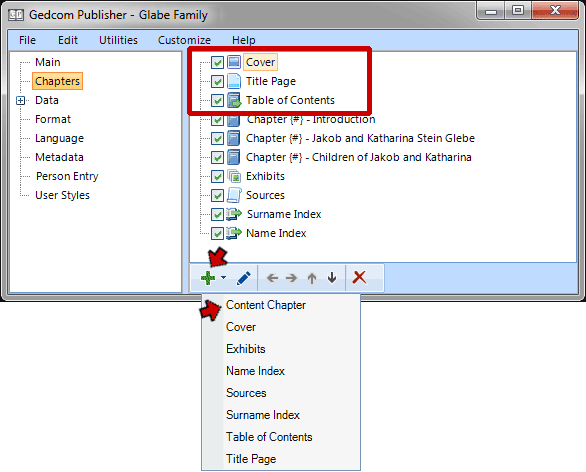
The cover and front matter are managed in the Chapters section of the Gedcom Publisher interface where they are listed in the order they will appear in the book:

We create a new front matter page by clicking the + drop-down at the bottom of the window, which produces the list shown in the screenshot. We select Content Chapter because that is the only one in which we can freely specify the content – all the other Items listed are pre-defined in the program. An Add Content Chapter Item window appears:
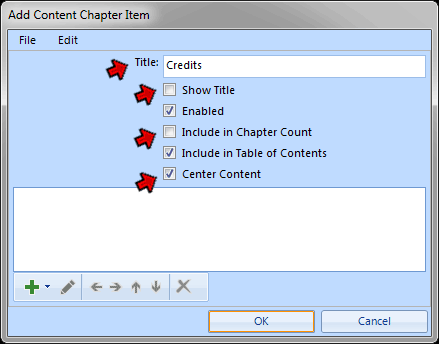
First we complete these fields at the top of this window:
Now we are ready to add the content to our page.
To add content to the page we click the + drop-down at the bottom of the Add Content Chapter Item window, and see this list of potential content items:
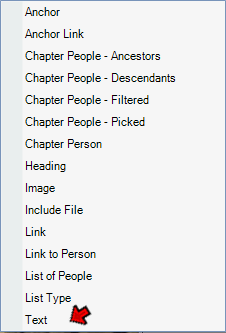
Several of the content items are potentially useful for front matter pages, especially the Anchor Link, Image, and Link items. But for our credits page we choose the Text Item, and see the Edit Text Item window:
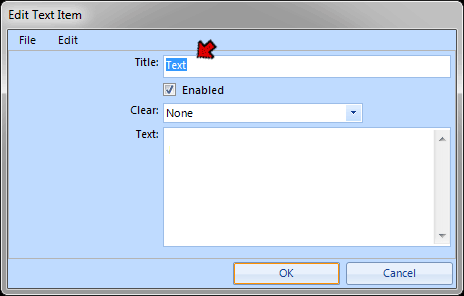
We enter a Title in this window. If we expected to have several content Items we might choose a more descriptive title, but since we expect to only use one the simple "text" will suffice.
The actual text to be placed in the page is entered in the Text field. But it must be written as HTML – the language of webpages. For those not comfortable writing in HTML using the HTML editor is a better choice. We click in the Text field and press the F7 key to open the editor::
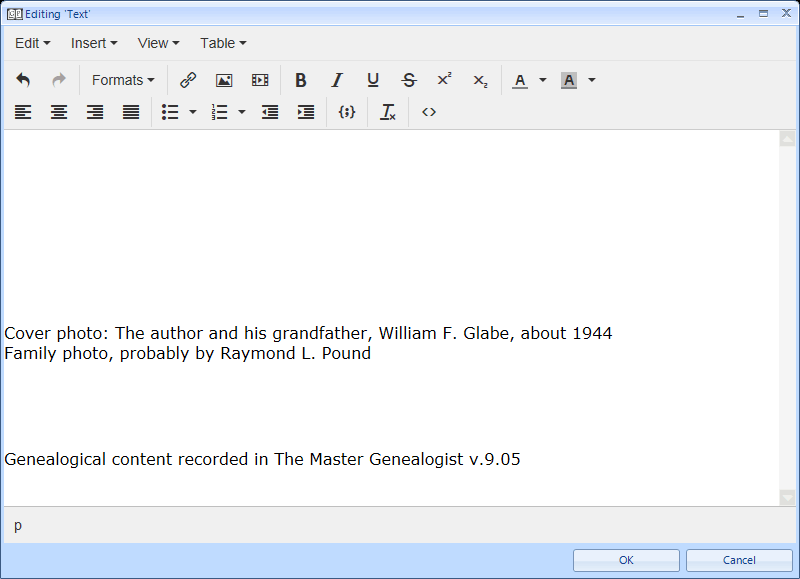
Here we have entered a credit for the cover photo and also noted the source of the genealogical content. We might also have entered a credit to Gedcom Publisher here, but it automatically appears on the Title page, and removing it from there is tricky.
Several points should be noted about entering text like this in front matter pages:
When we close the HTML editor, the Edit Text Item window, and the Add Content Chapter Item window we return to the Chapters section of the Gedcom Publisher interface:
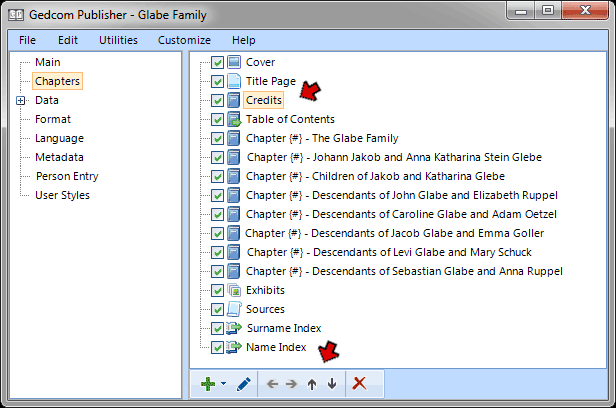
Here we have moved our new Credits section up to the place we want it to appear, after the Title Page. We can do that either by dragging with the mouse or clicking it and using the up and down arrows at the bottom of the window.
When we re-make the book and navigate to the credits page, we see this:
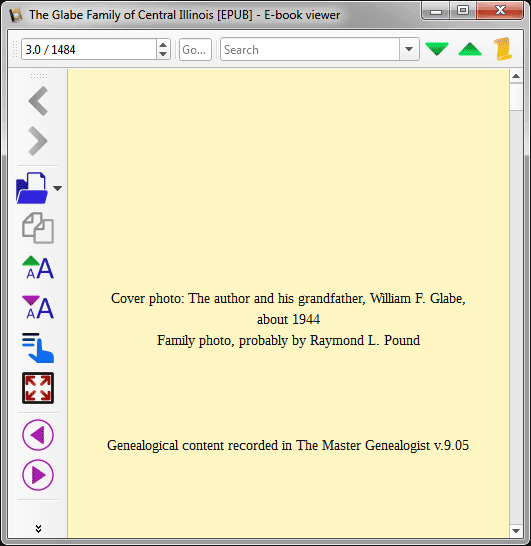
Note how this particular view screen width demonstrates the risk of trying to manage the length of text lines ... the "about 1944" phrase that we had intended to be on the first line is displayed on its own line by the e-reader because of the text size and screen size being used.
| ReigelRidge Home | Terry's Tips Home | Contact Terry |
Copyright 2000- by Terry Reigel